Printing Proof
First: I’ve not been printmaking long. The local Art Thrift Store (not its real name) had some super cheap lino and a couple of tools, and I’d been wanting to try it out for aaaaages. So, for about $15, I came home with a few reasonably-sized scraps of battleship gray linoleum, two gouges, and a roller. Haunting the Art Thrift Store on multiple occasions expanded my toolkit to include a few pieces of carbon paper and a half-used tube of waterbased speedball block print ink.
I was impressed with everything but the ink; a series of watching youtube videos and web searching to find out how to make it better, and the ultimate response was, “Use oil-based ink for better results.”
So, yesterday, I used oil-based ink (Gamblin Portland Intense Black) for the first time. SO MUCH LEARNING AND SO MUCH TO LEARN.
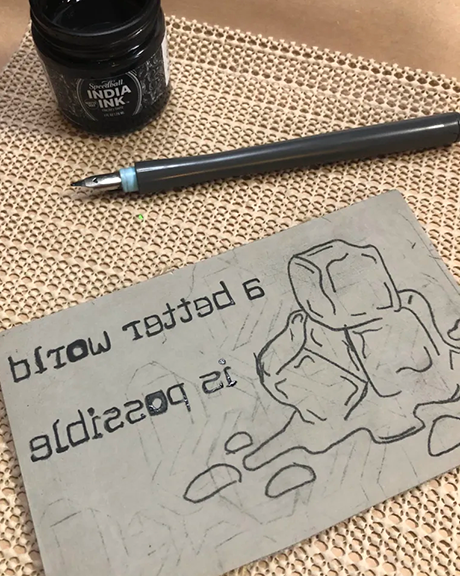
This was the image I was hoping to print out. As a novice, having so many fine lines is a ridiculous idea, but I’ve never really been the type to follow rules about the learning process. More than anything I have to be passionate about my project, and I’ll learn my lessons along the way. I drew the image myself in Krita, and then added text – I’m pretty limited in my lettering ability (another skill to learn along the way), so this was somewhat easier.
I managed to get it transferred, no problem. Carbon paper (excuse me, graphite paper) is such a blessing. I then went over it in India ink, using a dip pen, so the transfer wouldn’t rub off, or get confused with the other image there (this was scrap lino I found at the Art Thrift Store).
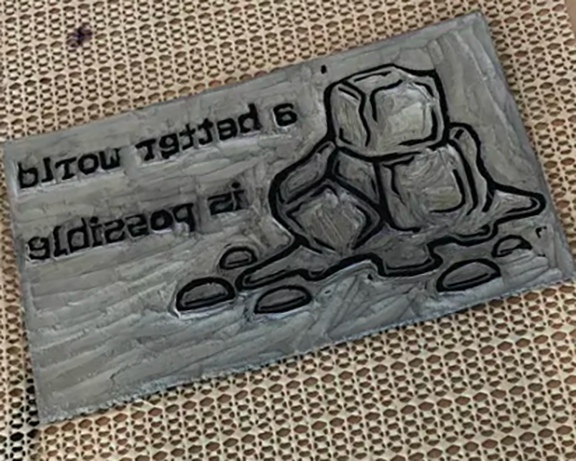
Got it carved! Hoo, boy, do I need to reconsider my life choices when it comes to fine lines. I went over it in sharpie to make sure that I didn’t miss anything, or leave to much, and was mostly happy with my result. I will say, that e – that last e, in “possible” – the top of that gave me problems. It seems I undercut myself a bit (poor tool management, I’m getting better) and it was not structurally sound.
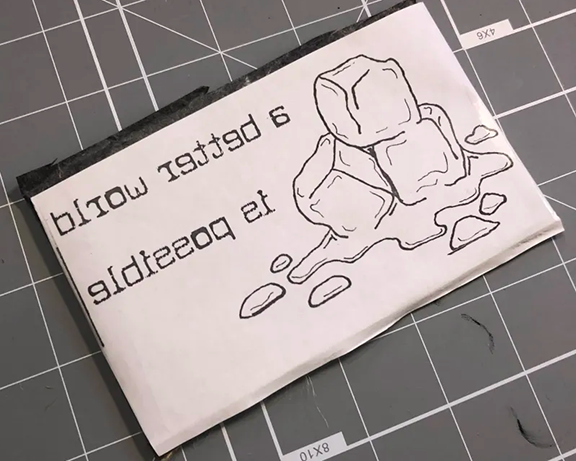
I rolled it in black, and printed it. I hand print – I don’t (yet?) have a press, and I really like the tactile experience of putting in force, getting out image.

The top part of the e at the end broke off on the print, so I only managed to pull one of these. Like I said, this was part of a larger print run – I’m going to wait ‘til those ones are done before I share them – but wow, there was a lot of learning that happened!
Lessons Learned
A registration system would be an excellent addition. It doesn’t need to be anything fancy, and I’m sure I have everything I need to do it, but a few of my prints ended up rather wonky on the paper. The size is such that I’ll be able to cut it down to get it straight, but especially if I’m going to do reduction prints – which I want to do! – I’m going to need it.
Undercutting edges is a recipe for disaster. Linoleum behaves a lot like earth: if there’s nothing holding it up, it’s going to crumble when force is applied. So, a little more carefulness and mindfulness in the cutting process is required.
Corollary to 2: I need a strop and/or sharpener. Some of the tools I’ve acquired are great but need a good edge put on them; others, well, maybe I just need to replace them. It’ll help the control of the blades and prevent some of the struggle I had in getting good cuts.
Dirty kitchen oil isn’t a terrible tool for the initial cleaning of ink. We do a fair bit of frying of things, and the oil gets jugged for a guy we know who does his own biodiesel. I started using mineral spirits to wipe off the ink, but it was making a huge mess on the blocks – to say nothing of the tools – and god, the smell. So, grabbed some of the dirty kitchen oil – and wow. That worked really, really well. Then, a soap scrub and my tools and blocks are clean and ready for the next time.
There are a lot of recommendations for paper-type to use with printing. I’ve now tried a number of them, and got my cleanest prints off 400 gsm “paper” designed for acrylics, a 160-gsm mixed media sheet, and some random textured colored paper from one of those big colored paper books designed for scrapbooking. The watercolor paper was kinda meh (which is unfortunate, because I intend to paint some of the prints), and some of the lighter papers were okay, but somehow I liked the heavier stuff the best – even though it was a lot of work to get a good emboss on it. I can see now why presses are so important! Honestly, though, I dream of making my own paper to print on, so we’ll see how that goes then.
I have 2 brayers (a speedball one and a japanese-style bamboo leaf one), and I still find a piece of sanded plywood best for my prints.
The cool thing about being non-trained and never an art student is that I don’t know what rules I’m breaking because I don’t know the rules. I watch a lot of videos and read a lot, but it’s really neat starting things where I just have a vague idea of what I want to make, and then getting to the making process.
[insert some pithy quote or important call to action here.]